Real-Plant Collagraphs

Real Plant Collagraphs
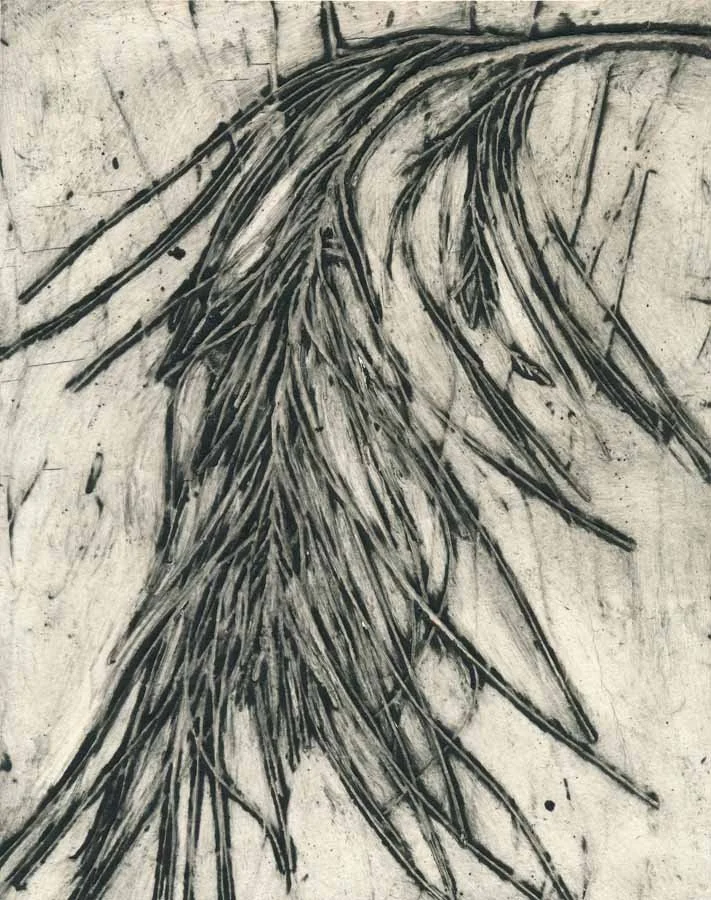
Collagraphs are prints made with printmaking plates that have textured materials glued onto them to form an image. The plate is essentially a collage.
The name collagraph comes from the French colle, meaning glue, and the Greek graphos, meaning drawing.
The base of the plate, (or substrate, or matrix – different words for the same thing) is any suitable thin flat material. I favour framers’ mat board.
There are many ways of making collagraph print images. They all involve the gluing of textured materials that don’t have too much relief onto the matrix. Different materials have different ink holding capacities, so by choosing the shape and placements of these materials, an image is formed when the plate is inked and printed.
Real-Plant Collagraphs
My main interest had always been in plants, and most of the images of prints in the galleries are of real-plant collagraphs.
I use real plants to make the plates because I love the shapes and patterns of leaves and branchlets, and especially of grasses.
I start by sealing the front and back of the mat board pieces that are destined to become plates. This keeps the back of the plate clean(ish) and prevents the printmaking ink from soaking in and making the inked side of the plate very dark and hard to use.
I use shellac as a sealer because …
(1) It evaporates quickly, and several coats can be applied in a day. Acrylics and mediums generally need much longer to cure enough for subsequent coats or processes.
(2) Shellac is meths soluble. This means I can use Turps to clean the oil-based inks I favour off the plates when I have finished editioning.
(3) When I start with a pre-shellacked base, the plate develops a lovely warm colour at the end of the process that I find really pleasing.
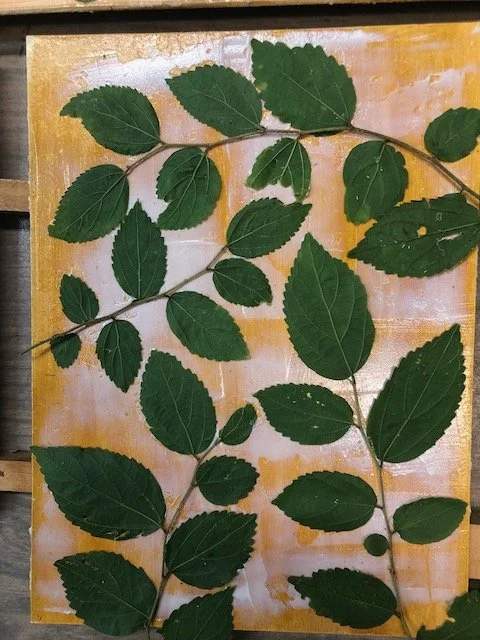

Gluing the Plant to the plate
Any glue can be used – PVA, acrylic gels, contact glues, spray adhesives. Glue texture that appears on the plate background will print, and the type of glue used affects the appearance of the print, and the look of the plate.
PVA glue is self-levelling, and tends to appear smooth on the background. Because PVA takes a while to cure enough to become sticky, it works best with plants that are flat, and need little encouragement to stay flat.
·Acrylic gel mediums tend to leave trowel marks. They are thicker than PVA glue, but still take a while to cure enough to really grab. Again, flatter plants work best.
Solvent based contact adhesives form uneven surfaces. They work well with plants that are more insistent on maintaining three dimensions, that need more encouragement to stick to the 2 dimensions of a plate. However, the solvents are nasty so I don’t use them. That is also why I don’t use spray adhesives.
Water based contact adhesive leaves trowel marks. This my go to adhesive for the plant that is strongly three dimensional. This style of glue becomes really sticky and work well with all plants.
Sometimes strongly 3D plants need extra help to keep them on the plate until the glue has cured enough to strongly grab. I have a whole collection of flat based little weights of varying heaviness to help keep plant parts down until they are properly stuck.
The image shows two flat little stones holding down a plant, while a pair of scissors holds down the stem ends.
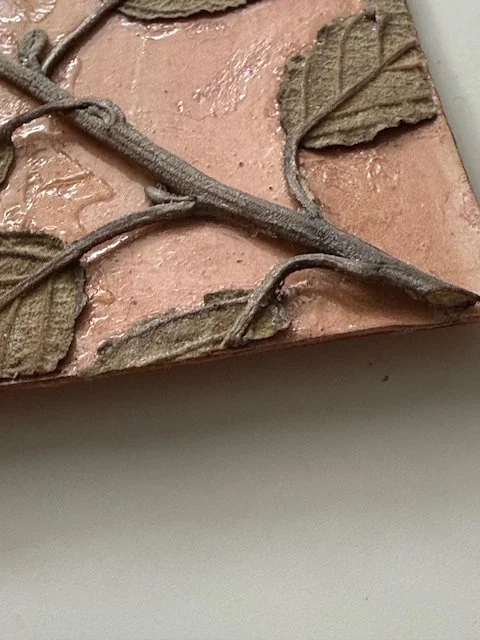
Stabilising the fresh green plant comes next. I find that if I cover fresh plant material with gloss acrylic medium, a film forms over the plant that holds the shape and texture. The plant then slowly dries under the film before it begins to wilt or curl up. Usually I cover the whole plate, but sometimes more tender plants begin to wilt and curl before the glue is completely cured. I then just cover the plant. However, eventually the whole plate will be sealed with gloss acrylic medium.
The plate then needs to be made print-ready, before receiving its final coats of shellac varnish. This is important because there can be no undercuts or spaces under plant parts.
Fill in overhangs – Overhangs can occur along stem and leaf edges. Ink can accumulate there when inking up a plate, which then squishes out during the printing, ruining the print.
However, overhangs must not be over-filled either. An edge is needed to hold some ink so that the outline of the plant will be printed.
Fill in deep dips in the glued plant. The paper won’t bend enough to print the bottom of deep dips. This results in spots on the print with no plate tone. They become particularly noticeable and a problem if some parts of the print are quite dark.
Shellacking the print-ready plate. Once the glues and mediums of the print-ready plate are all cured the plate is ready for it’s final shellac varnish. I like to give 3 coats. And when everything is cured and dry, the plate is ready for printing - a whole other exciting process.